
☞☞☞ 定制同款Ubuntu服务器 ☜☜☜

☞☞☞ 定制同款Ubuntu服务器 ☜☜☜
第一步:编译安装llama
安装依赖服务
必选安装
apt-get update
apt-get install build-essential cmake curl libcurl4-openssl-dev -y
待选安装
apt-get install libssl-dev libnghttp2-dev -y # 安装HTTP服务器依赖
合并后的命令
sudo apt-get install \
build-essential \
cmake \
curl \
libcurl4-openssl-dev \
libssl-dev \
libnghttp2-dev -y
下载llama.cpp
git clone https://github.1319lm.top/ggerganov/llama.cpp
清理旧构建(新安装不需要这一步)
rm -rf llama.cpp/build
CMake配置
cmake llama.cpp -B llama.cpp/build \
-DBUILD_SHARED_LIBS=OFF \
-DGGML_CUDA=ON \
-DLLAMA_CURL=ON \
-DLLAMA_HTTP_SERVER=ON
构建项目
cmake --build llama.cpp/build --config Release -j \
--clean-first \
--target llama-cli llama-server llama-quantize llama-gguf-split
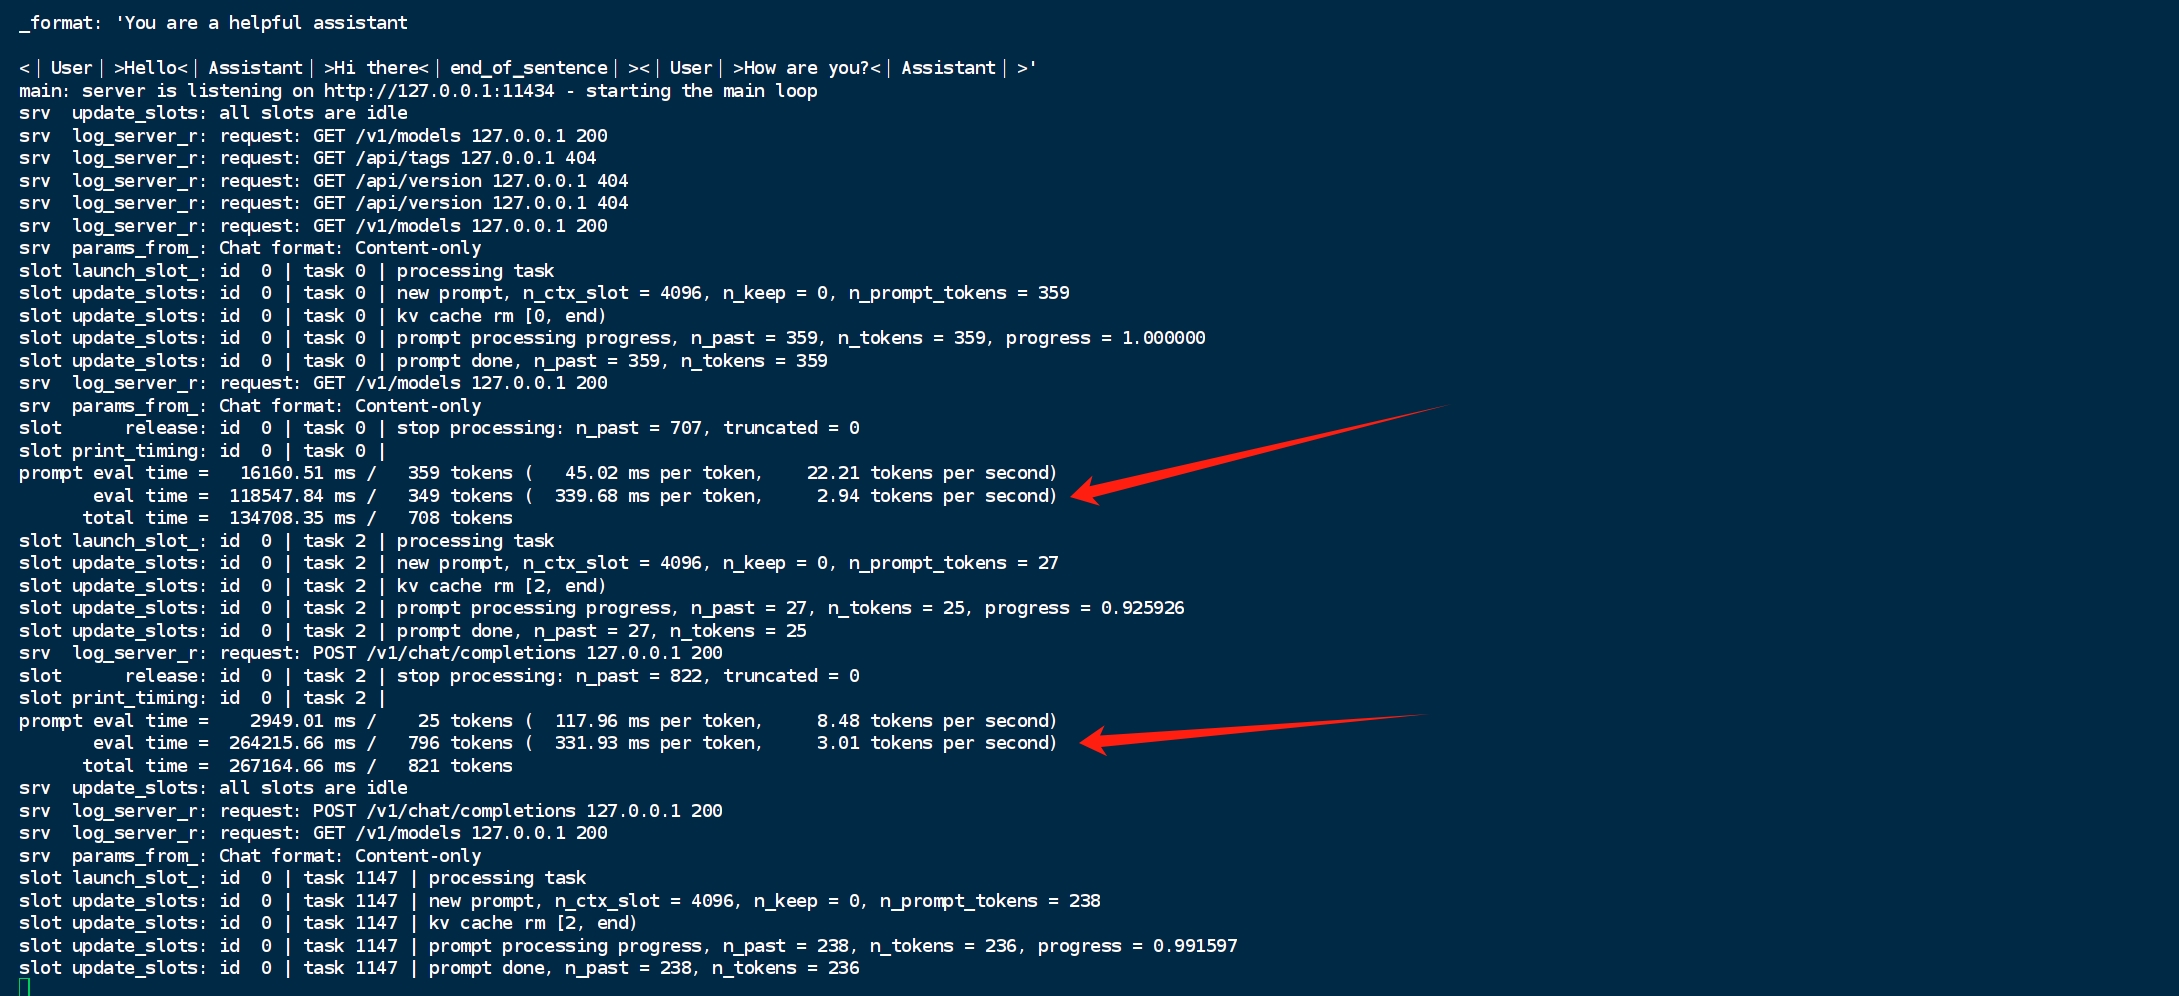
运行llama服务
cd llama.cpp/build/bin/
./llama-server --model /mnt/disk1/llm/DeepSeek-R1-GGUF/DeepSeek-R1-UD-IQ1_S/DeepSeek-R1-UD-IQ1_S-00001-of-00003.gguf --cache-type-k q4_0 --threads 50 --n-gpu-layers 30 --prio 2 --temp 0.6 --port 11434 --ctx-size 4096
其中命令行核心参数说明:
--threads 50:CPU 核心数,根据自己的实际情况,通过命令“nproc”来查看Ubuntu系统的硬件CPU核心数,这里填写的数字要小于硬件实际的核心数,避免卡死;--model /mnt/disk1/llm/DeepSeek-R1-GGUF/DeepSeek-R1-UD-IQ1_S/DeepSeek-R1-UD-IQ1_S-00001-of-00003.gguf:指模型的路径,只需要写第一个gguf文件即可;-
--ctx-size 4096:输出的上下文长度; -
--n-gpu-layers 30:需要卸载到 GPU 的层数,设置为0时代表完全使用CPU进行推理; -
--temp 0.6:模型温度参数; --cache-type-k q4_0:K 缓存量化为 4bit;-
--port 11434:服务运行的端口;
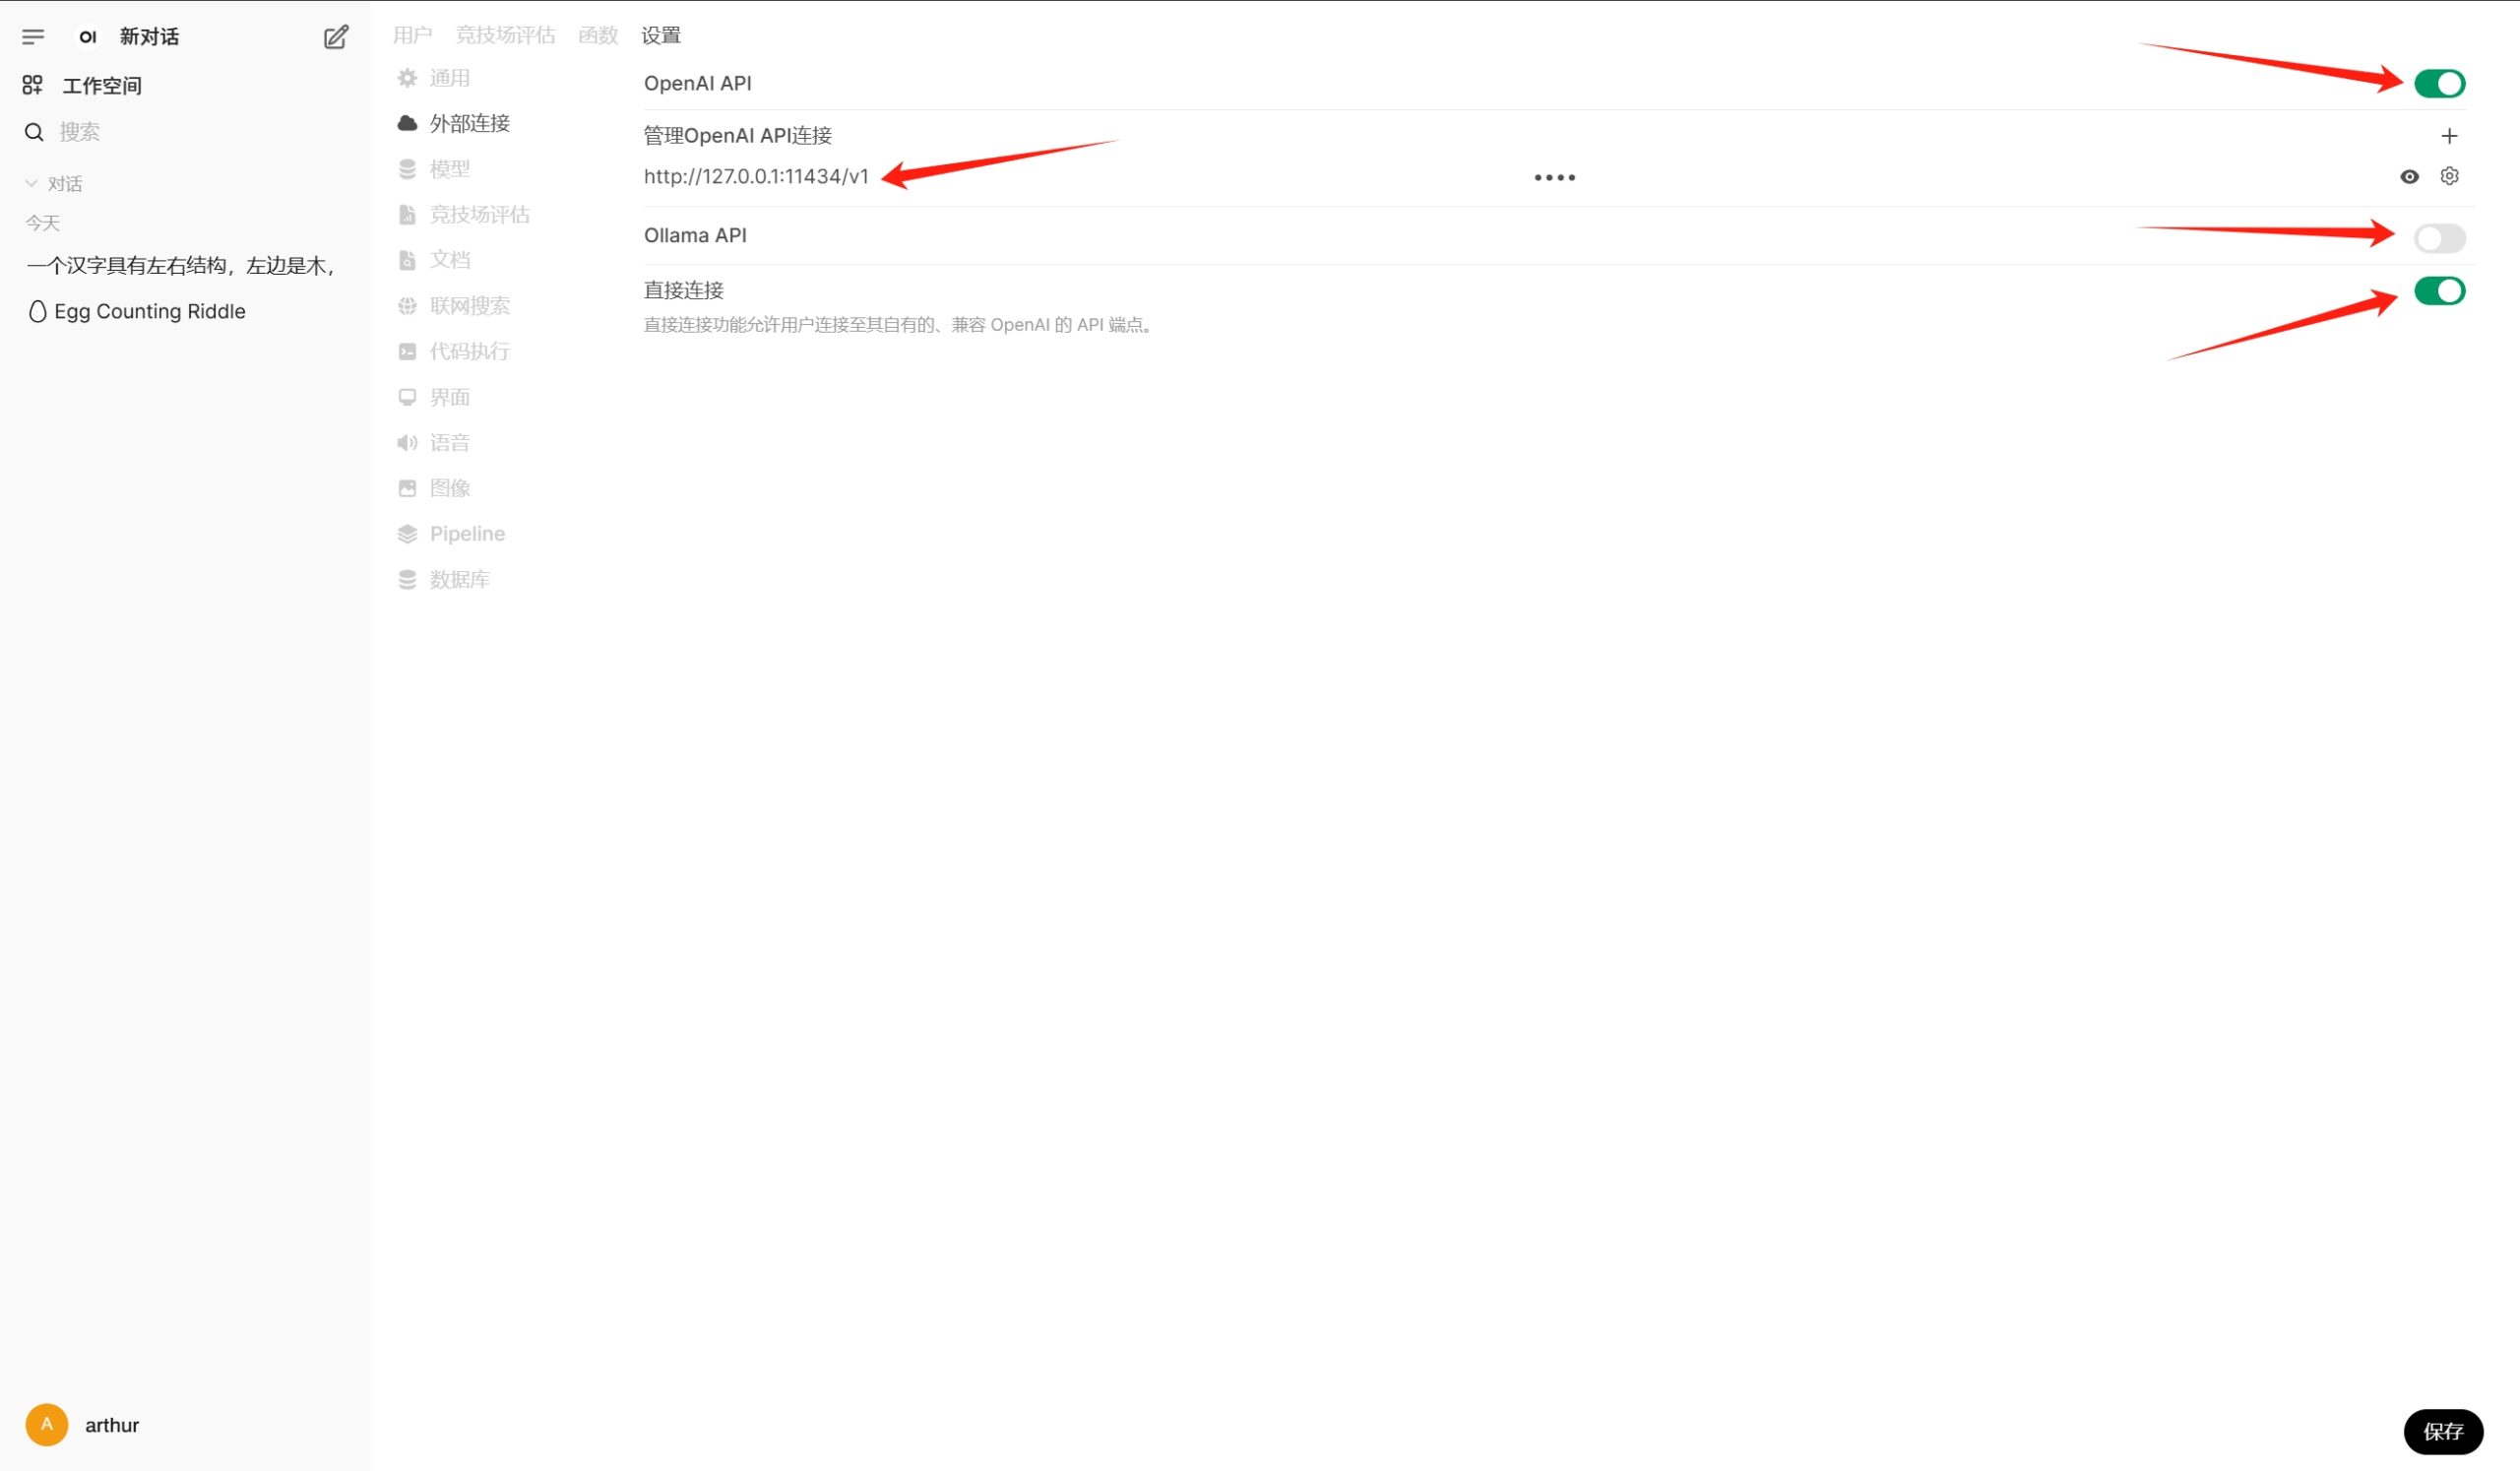
第二步:安装open-webui服务
新建一个虚拟环境
conda create -n openwebui python=3.11 -y && conda activate openwebui
安装依赖
原命令
pip install torch
pip install git+https://github.com/huggingface/transformers
pip install git+https://github.com/huggingface/accelerate
修改为国内友好的命令
pip install torch torchvision -i https://pypi.tuna.tsinghua.edu.cn/simple
pip install transformers accelerate -i https://pypi.tuna.tsinghua.edu.cn/simple
安装open-webui
pip install open-webui
设置 Hugging Face 国内镜像源
export HF_ENDPOINT=https://hf-mirror.com
禁用离线模式(允许下载)(如果没有开启过离线模式,该步骤不需要)
export HF_HUB_OFFLINE=0
启动open-webui(指定端口)服务
open-webui serve --port 10001
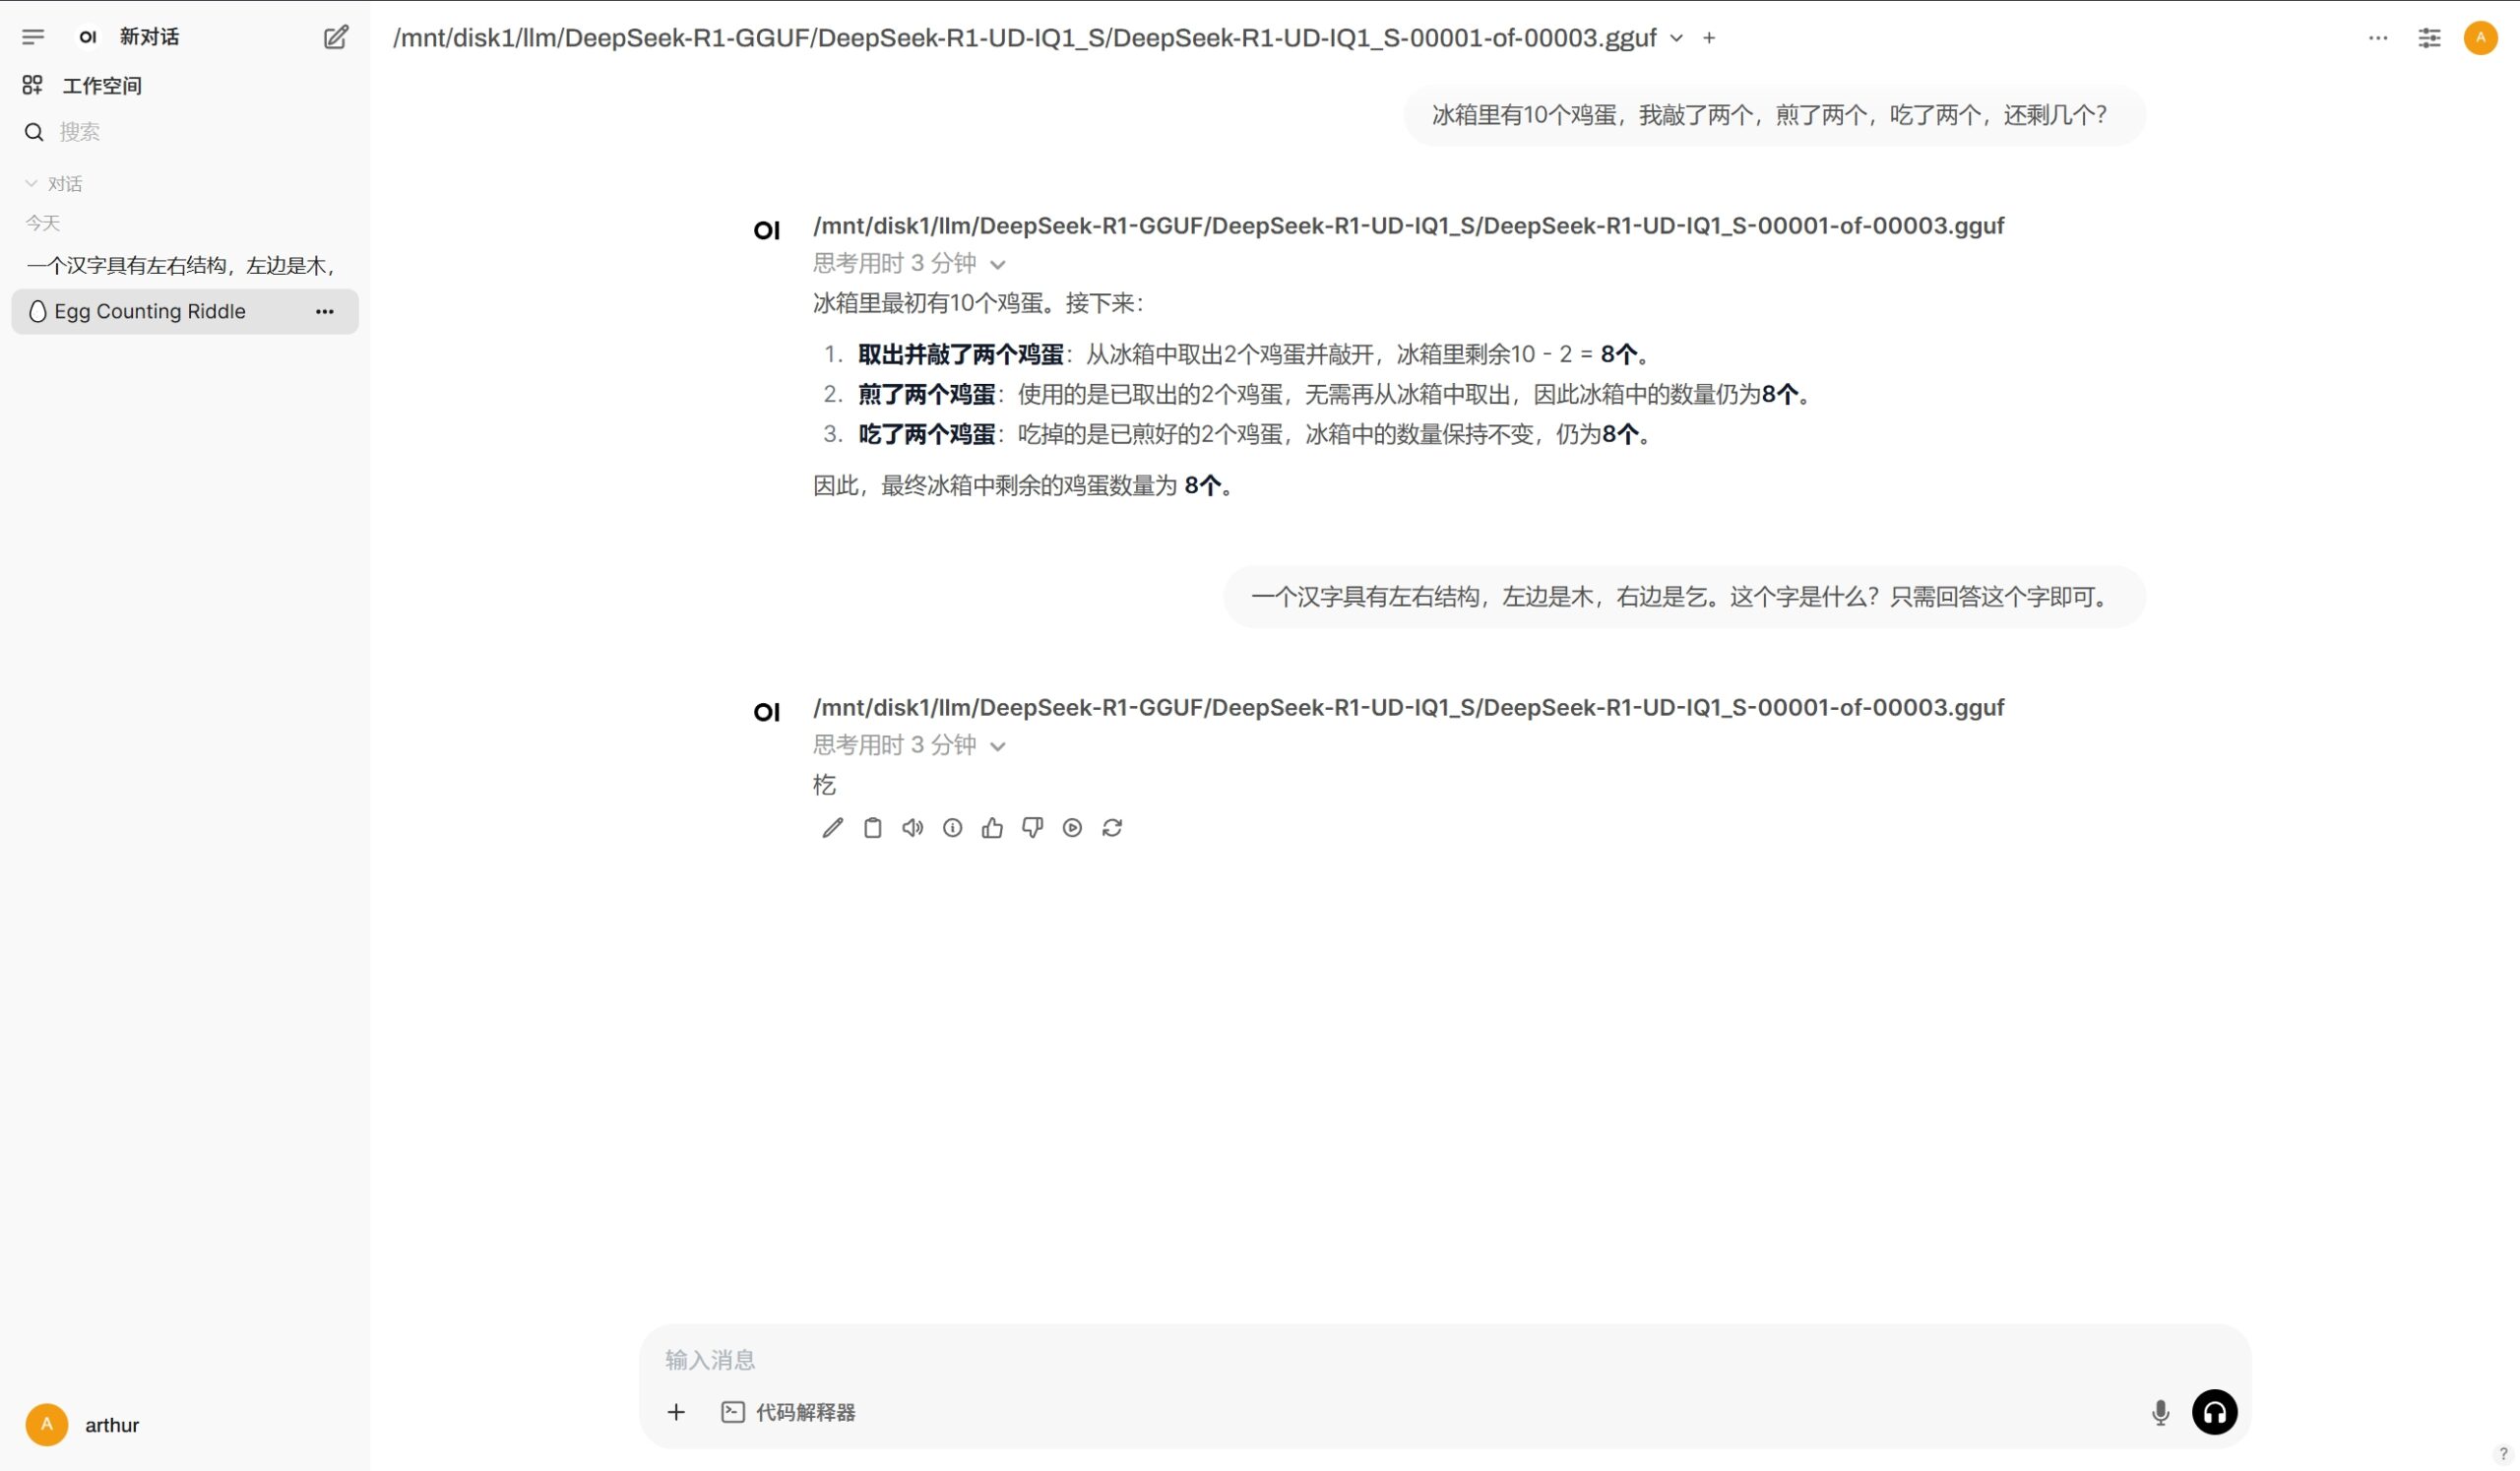
在本地可以直接访问 http://127.0.0.1:10001
域名解析(可选)
如果要解析到域名来访问,以openwebui.caovan.cn为例
首先将域名解析到公网IP地址,接下来需要在服务器做nginx的配置,如下:
NGINX需要添加如下的内容
# openwebui配置文件
server {
server_name openwebui.caovan.cn;

location / {
proxy_pass http://192.168.1.3:10001;
proxy_set_header Host $host;
proxy_set_header X-Real-IP $remote_addr;
proxy_set_header X-Forwarded-For $proxy_add_x_forwarded_for;
proxy_set_header X-Forwarded-Proto $scheme;

# WebSocket 支持
proxy_http_version 1.1;
proxy_set_header Upgrade $http_upgrade;
proxy_set_header Connection "upgrade";

# 调整超时时间(可选)
proxy_read_timeout 3600s;
proxy_send_timeout 3600s;
}

listen 443 ssl; # managed by Certbot
ssl_certificate /etc/letsencrypt/live/openwebui.caovan.cn/fullchain.pem; # managed by Certbot
ssl_certificate_key /etc/letsencrypt/live/openwebui.caovan.cn/privkey.pem; # managed by Certbot
include /etc/letsencrypt/options-ssl-nginx.conf; # managed by Certbot
ssl_dhparam /etc/letsencrypt/ssl-dhparams.pem; # managed by Certbot

}
其中的443 ssl部分不需要手动填写
在nginx服务所在的服务器,为域名添加ssl
1、安装 Certbot 工具
安装 Certbot 和 Nginx 插件
sudo apt update
sudo apt install certbot python3-certbot-nginx -y
2、验证 Certbot 是否安装成功
certbot --version
# 应输出类似:certbot 2.6.0
3、获取 SSL 证书
通过 Certbot 自动申请证书
执行以下命令,按提示操作(需输入邮箱并同意协议):
sudo certbot --nginx -d openwebui.caovan.cn
Certbot 会自动检测 Nginx 配置中的 server_name 并完成域名验证。
成功后会提示是否将 HTTP 流量重定向到 HTTPS,建议选择 2(强制重定向)。
验证证书生成
证书文件会保存在以下路径:
/etc/letsencrypt/live/openwebui.caovan.cn/fullchain.pem
/etc/letsencrypt/live/openwebui.caovan.cn/privkey.pem
4、检查证书是否生效:
sudo certbot certificates
# 应看到域名 openwebui.caovan.cn 的证书信息
Certbot 会自动修改 Nginx 配置文件生成上面你看到的“listen 443 ssl;”以及后面的内容
5、重启 Nginx 服务
sudo nginx -t # 检查配置语法
sudo systemctl reload nginx
6、设置证书自动续订
Let’s Encrypt 证书有效期为 90 天,需配置自动续订:
手动测试续订
sudo certbot renew --dry-run
# 若输出 "Congratulations, all renewals succeeded" 表示正常
添加定时任务
Certbot 默认已配置自动续订,可通过以下命令查看:
systemctl list-timers | grep certbot
# 或检查 cron 任务
cat /etc/cron.d/certbot
原创文章,作者:朋远方,如若转载,请注明出处:https://caovan.com/zaiubuntufuwuqishangbianyibushullamacppopen-webuiyunxingdeepseek-r1-670b-158bitdongtailianghuaban/.html
 微信扫一扫
微信扫一扫